Choosing the Right Cameras
Some providers pair cameras with apps, AI-assisted detection, and 24/7 professional monitoring. Vivint emphasizes AI-based people/package detection on its Doorbell Camera Pro and uses professional installation. ADT offers both DIY (Self Setup) and Pro Installation, with app control and optional monitoring. Frontpoint and Cove focus on DIY systems and straightforward setup. Brinks Home provides systems with professional installation and 24/7 monitoring. Select devices that fit your layout, privacy preferences, and budget.
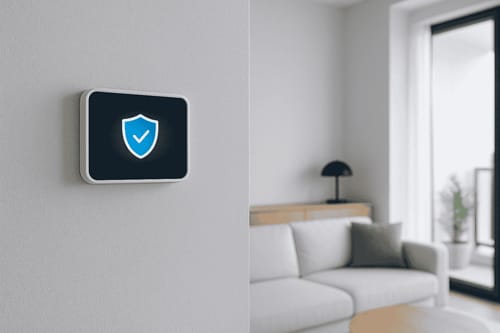
Should I Get Security Cameras Installed Professionally?
DIY works for many homes, but professional installation can save time and help ensure the cameras are placed for the best coverage. ADT offers both DIY options (Self Setup) and professional installation, while Vivint systems are professionally installed. Before choosing, think about how comfortable you are mounting and positioning cameras, and weigh any setup fees against the convenience of expert help.
Where to Install Security Cameras
Front Door
Use a video doorbell or camera that clearly captures faces and packages. Studies estimate tens of millions of packages were stolen nationwide in 2024, so front-door clarity matters. Many companies include package/person detection and deterrence features that can help manage “porch piracy.”
Back Door
This is a common entry point. Place a camera above the door and angle it slightly downward so it captures more of the area. If you want clear video at night, look for a camera with night vision. If the camera will be outside, make sure it’s rated for outdoor weather.
Garage
Garages often contain high-value items. Place exterior cameras about 8-10 ft high (where feasible) and tilted down to deter tampering and capture faces/plates; add an interior camera to watch vehicles and tools.
Windows
Ground-floor and basement windows are common access points. Aim cameras to view both the window and the approach area. Where windows aren’t visible from the street, consider extra coverage or a door/window sensor plus lighting.
Living Spaces
Use discreet, wide-angle cameras and enable people detection to reduce false alerts, then avoid filming private areas (e.g., bathrooms). Cove and other DIY brands market easy-install, person/pet-aware options - check model specs before purchase.
Hallways
Cover corridor ends and intersections. As a general rule, mount around 8–10 ft high with a slight downward tilt to avoid glare and maximize field of view.
Staircases
Position cameras to view up and down the stairs—landings work well. For outdoor stairs, use weather-rated devices and night vision. Indoors, maintain angles that avoid shining lights directly into the lens.
Perimeter (Yard, Driveway, Fences)
Choose outdoor models with robust weather ratings (IP65/IP66/IP67), clear sight lines, and WDR (wide dynamic range) to handle headlight glare and shadows. Trim plants and remove obstructions that create blind spots.
Outbuildings (Detached Garages, Sheds)
These isolated spots can attract theft. Mount one camera for the door/entry and another to overlook the area for overlapping visibility. Use weather-rated models and consider motion lighting.
High-Value Rooms
For rooms with jewelry, art, or cash, use discreet cameras covering entries and overlapping zones, not the contents of safes or private storage. Consider motion sensors that can trigger recording when needed.
Blind Spots
Walk your property to identify hidden areas (alcoves, short corridors, overgrown landscaping). Adjust camera positions and add motion-activated lighting to eliminate shadows and improve footage.
» Check out these expert tips for installing discreet home security cameras.
Other Considerations for Installing Security Cameras
Dial in Positions and Angles
- Height: For most outdoor cams, ~8–10 ft is a good target; indoors, ~5–8 ft is typical.
- Tilt: Aim slightly downward to keep faces in frame and reduce sky glare.
- Coverage: Pan/placement should cover entries with minimal overlap.
Avoid Reflection and Glare
Don’t aim directly into lamps, windows, or mirrors. For windows, keep lenses flush to reduce reflections. Outdoors, mount under eaves or add a small shade to prevent sun in the lens and to help with heat management.
Consider Durability
For outdoor use, choose a camera that’s built to handle rain, dust, and the temperatures where you live. Installing it under an eave can also help protect it from direct weather and harsh sunlight. Some higher-end models add extra protection against bumps and extreme temperatures.
Test Before You Mount
Before drilling holes, power the device, connect it to the app, and run motion tests. If you see lag or connectivity issues, troubleshoot or exchange the device.
Prioritize Lighting
Test day and night. Add motion-activated lighting and select cameras with IR/low-light and WDR features to handle harsh contrast and headlights. Keep lenses and fixtures clean for best results.
Laws on Where to Place Security Cameras (U.S.)
Generally, video recording is lawful where there’s no reasonable expectation of privacy (avoid bathrooms, bedrooms, changing areas). Audio recording is different: many states allow one-party consent, while others require all-party consent for in-person or phone conversations. Before enabling audio, review state-by-state resources and consider disabling audio if unsure.
Achieving safety in your own home shouldn't cost someone else's comfort. For broader privacy context, see EPIC. This section is informational and not legal advice.
Optimize Your Home Security
Effective home security layers good placement, sensible lighting, and the right mix of DIY or pro installation. ADT, Vivint, Brinks Home, and other providers can tailor systems to your layout; verify installation options, monitoring terms, and device specs before you buy.
Quick Reference: Placement Tips
Front & back doors: face entries; consider a doorbell cam at the front.
Garage: exterior cam high/tilted, plus an interior cam.
Windows: cover the glass and the approach.
Hallways/stairs: ends and landings; slight downward tilt.
Perimeter/outbuildings: long-range outdoor cams, IP65+; clear obstructions.
Lighting: add motion lights; prefer cameras with IR and WDR.
» Find out how to choose the best home security system.
Installing cameras works best as part of a layered plan: cover doors first (front and back), add views of the garage, key windows, and hall/stair pinch points, then extend to the perimeter and any outbuildings. Mount most units around 7-9 ft high with a slight downward tilt, trim obstructions, and pair cameras with motion lighting, IR/night vision, and (where available) WDR for clear day-and-night footage. Test placement and connectivity before you drill, and maintain lenses and lights. Choose DIY or professional installation based on your layout and comfort level, and always respect privacy - avoid private areas and check your state’s audio-consent rules if you enable sound.